Traditional Recipe of Makhan
Making yogurt-based makhan (butter) is a traditional process that has been practiced in many cultures, especially in India, for centuries. This method involves churning yogurt to separate the butterfat from the buttermilk. The resulting butter, known as “makhan,” has a rich, tangy flavor that reflects the natural fermentation of yogurt. This guide provides a comprehensive step-by-step approach to making yogurt makhan, ensuring that you understand each phase of the process, from preparing the yogurt to churning and storing the butter.
Ingredients
- Whole Milk: 2 liters (for making yogurt)
- Starter Yogurt Culture: 2 tablespoons (plain yogurt with live cultures)
- Ice-Cold Water: Optional, for washing the butter
Equipment
- Heavy-Bottomed Pot: For boiling milk.
- Mixing Bowl: For making and storing yogurt.
- Cloth or Lid: To cover the yogurt while it sets.
- Traditional Wooden Churner/Hand Mixer/Blender: For churning the yogurt.
- Strainer or Cheesecloth: For separating the butter from the buttermilk.
- Butter Paddle or Spoon: For shaping and washing the butter.
- Container: For storing the butter and buttermilk.
Step 1: Preparing the Yogurt
- The first step in making yogurt-based makhan is to prepare fresh, homemade yogurt. This process ensures that you have a rich, high-fat yogurt that will yield the best butter.
- Boil the Milk: Start by pouring 2 liters of whole milk into a heavy-bottomed pot. Heat the milk over medium heat until it comes to a boil. Stir occasionally to prevent the milk from sticking to the bottom of the pot.
- Cool the Milk: Once the milk has boiled, remove it from the heat and let it cool down. The milk should be lukewarm, around 110°F (43°C), which is the ideal temperature for the yogurt culture to thrive.
- Add the Starter Yogurt Culture: Take 2 tablespoons of plain yogurt (with live cultures) and mix it with a small amount of the lukewarm milk in a separate bowl. Once the yogurt is well-mixed and smooth, stir it back into the pot of milk.
- Incubate the Yogurt: Pour the mixture into a clean mixing bowl. Cover the bowl with a lid or a clean cloth to keep it warm. Let the yogurt set undisturbed for 6 to 8 hours, or until it thickens. The time required for setting can vary depending on the ambient temperature.
- Refrigerate the Yogurt: Once the yogurt has set, place it in the refrigerator to cool. Cold yogurt is easier to churn and yields better butter.
Step 2: Preparing the Yogurt for Churning
- Before churning, it’s important to ensure the yogurt is in the right condition for making butter.
- Check the Consistency: The yogurt should be thick and well-set. If it appears too runny, strain it through a cheesecloth or fine mesh strainer to remove excess whey. This will give you a thicker yogurt, which is ideal for making butter.
- Bring to Room Temperature: Take the yogurt out of the refrigerator and let it come to room temperature. Cold yogurt is harder to churn and may take longer to separate the butter.
Step 3: Churning the Yogurt
Churning is the process that transforms yogurt into makhan by separating the butterfat from the liquid (buttermilk). There are different methods to churn yogurt, depending on the tools you have at your disposal.
Method 1: Using a Traditional Wooden Churner
- Pour the Yogurt into a Churning Pot: Transfer the room-temperature yogurt into a traditional churning pot.
- Start Churning: Using a wooden churner, rotate it back and forth between your palms. This motion will gradually cause the yogurt to thicken and separate into butter and buttermilk. The process typically takes 20-40 minutes.
- Observe the Separation: As you churn, the yogurt will first become frothy and then begin to clump together as the butter separates from the buttermilk.
Method 2: Using a Blender or Hand Mixer
- Pour the Yogurt into a Blender: Place the yogurt in the blender jar.
- Blend at Low Speed: Begin blending at a low speed. Gradually, the yogurt will start to separate, with the butter gathering in clumps.
- Increase Speed if Necessary: If separation is slow, increase the speed slightly. Stop blending once the butter has fully separated from the buttermilk.
Step 4: Collecting the Butter
- After churning, the butter will be floating on top of the buttermilk, ready to be collected.
- Strain the Buttermilk: Place a strainer or cheesecloth over a bowl and pour the contents of the churning pot or blender into it. The buttermilk will pass through the strainer, leaving the butter behind.
- Gather the Butter: Use a spoon or your hands to gather the butter from the strainer. The butter may still contain some buttermilk, which needs to be washed out to improve the butter’s shelf life.
Step 5: Washing the Butter
- Washing the butter is essential to remove any remaining buttermilk, which can cause the butter to spoil if left untreated.
- Place the Butter in Cold Water: Transfer the butter to a bowl of ice-cold water. This will firm up the butter and make it easier to handle.
- Knead the Butter: Gently knead the butter in the water using your hands or a butter paddle. As you knead, you will notice the water becoming cloudy, indicating that residual buttermilk is being washed away.
- Change the Water: Drain the cloudy water and replace it with fresh cold water. Repeat the kneading process. Continue washing the butter in this manner until the water remains clear, signaling that the butter is clean and free of buttermilk.
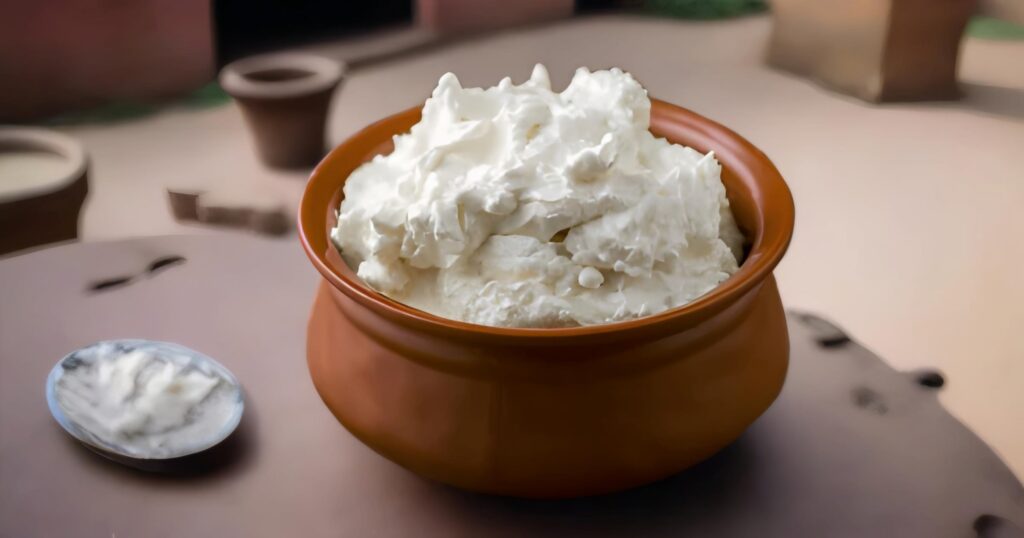
Step 6: Shaping and Storing the Butter
- Now that your butter is clean, it’s time to shape and store it.
- Shape the Butter: If you like, you can shape the butter into a block or ball using your hands or a butter mold. Traditional shapes include small rounds or logs, which are easy to store.
- Store the Butter: Place the shaped butter in an airtight container. Homemade yogurt-based butter can be stored in the refrigerator for up to two weeks. For longer storage, freeze the butter, where it can last for several months.
- Optional: Add Salt: If you prefer salted butter, knead in a pinch of salt during the shaping process. This will enhance the flavor and help preserve the butter.
Step 7: Utilizing the By-product – Buttermilk
- The buttermilk left behind after churning yogurt is a valuable by-product that can be used in various ways.
- Drinking: Traditional buttermilk is a refreshing and nutritious drink. It’s often enjoyed plain or with added spices like cumin, black salt, and mint.
- Cooking: Buttermilk is a great ingredient for baking and cooking. It can be used in recipes like pancakes, biscuits, or marinades, where its acidity helps tenderize and adds a unique flavor.
- Fermentation: Use buttermilk as a starter for fermenting vegetables or making homemade yogurt.
Tips for Making the Best Yogurt Makhan
- Use High-Quality Milk: The quality of your butter depends on the quality of the milk you use to make yogurt. Opt for fresh, full-fat milk for the richest results.
- Ensure Proper Fermentation: The yogurt must be properly fermented to develop the tangy flavor that characterizes yogurt-based makhan. The longer the fermentation, the tangier the yogurt, which translates into a more flavorful butter.
- Temperature Control: Keep the yogurt at room temperature before churning. If it’s too cold, the fat won’t separate easily, and if it’s too warm, the butter may become greasy.
- Patience in Churning: Churning yogurt takes time and effort, especially if using traditional methods. Be patient, as the butter needs time to fully separate from the buttermilk.
- Hygiene: Maintain high standards of cleanliness throughout the process to ensure your butter is safe to consume and has a longer shelf life.
- Flavor Variations: Experiment with adding herbs, spices, or garlic during the shaping process for flavored butter. This can add an interesting twist to your homemade butter.
Conclusion
Making yogurt-based makhan at home is a satisfying and rewarding process that allows you to connect with traditional culinary practices. The rich, tangy flavor of yogurt makhan is unmatched by any commercially produced butter, and the process of making it is both an art and a craft.
By following these detailed steps, you can create fresh, homemade makhan that is not only delicious but also free from preservatives and additives. Whether you spread it on warm bread, melt it over steamed vegetables, or enjoy it as a topping, homemade yogurt makhan brings a touch of tradition and flavor to your table. Plus, the buttermilk you produce in the process is a versatile ingredient that can be used in various recipes or enjoyed on its own.
Making yogurt-based butter at home is more than just a culinary activity; it’s a way to preserve and honor traditional food-making practices, ensuring that the rich flavors of the past continue to be enjoyed by future generations.
FAQs About Making Yogurt Makhan
-
What is the difference between yogurt makhan and regular butter?
Yogurt makhan is made by churning yogurt, which gives it a tangy flavor due to the natural fermentation of the yogurt. Regular butter, on the other hand, is typically made by churning fresh cream, resulting in a milder, creamier flavor.
-
Can I use store-bought yogurt to make makhan?
Yes, you can use store-bought yogurt to make makhan, but ensure that it is plain yogurt with live cultures and no additives. The yogurt should be thick and made from whole milk for the best results.
-
How long does it take to make yogurt makhan?
The entire process, including making yogurt, can take about 12-24 hours. This includes the time needed to set the yogurt (6-8 hours), bringing it to room temperature, and churning (20-40 minutes).
-
Why is my butter not separating from the yogurt during churning?
If the butter is not separating, it could be due to several factors:
Temperature: The yogurt might be too cold or too warm. It should be at room temperature.
Fat Content: The yogurt may not have enough fat. Ensure you use full-fat milk to make the yogurt.
Churning Method: Churn the yogurt steadily without rushing, as the separation process takes time.
-
Can I make yogurt makhan without a traditional churner?
Yes, you can make yogurt makhan using a hand mixer, blender, or even by shaking the yogurt in a jar. However, a traditional churner is often preferred for its authenticity and effectiveness in separating the butter.
-
How do I store yogurt makhan, and how long does it last?
Store yogurt makhan in an airtight container in the refrigerator, where it will last for up to two weeks. For longer storage, you can freeze it for several months. Ensure that the butter is well-washed to remove any buttermilk, which can spoil the butter.
-
What can I do with the leftover buttermilk?
Leftover buttermilk is a versatile by-product. You can drink it plain or spiced, use it in baking (like in pancakes or biscuits), or as a marinade for meats. It can also be used as a starter culture for making yogurt.
-
Can I add salt or flavorings to the makhan?
Yes, you can add salt or other flavorings like herbs, garlic, or spices during the shaping process. This allows you to create flavored butter according to your taste.
-
Is it necessary to wash the butter after churning?
Yes, washing the butter is essential to remove any residual buttermilk, which can cause the butter to spoil. Washing also improves the texture and ensures that the butter lasts longer.
-
What should I do if my yogurt makhan turns out too soft or greasy?
If your makhan is too soft or greasy, it may be due to the butter being too warm during the churning or shaping process. Try cooling it down in ice-cold water before shaping. If it’s still greasy, it could be over-churned, so reduce the churning time next time.
-
Can I make yogurt makhan with low-fat milk?
While you can technically make yogurt makhan with low-fat milk, the yield will be lower, and the butter may not be as rich and creamy. For best results, use full-fat milk.
-
Why does my homemade yogurt have a different taste each time?
The taste of homemade yogurt can vary due to several factors, such as the type of milk used, the incubation temperature, and the freshness of the yogurt culture. Consistency in these factors will help achieve a more uniform taste.
-
What type of milk is best for making yogurt makhan?
Whole, full-fat milk is best for making yogurt makhan as it has a higher fat content, which yields more butter. Fresh, non-homogenized milk is ideal if available.
-
Can I use flavored or sweetened yogurt to make makhan?
It’s not recommended to use flavored or sweetened yogurt for making makhan, as these additives can affect the churning process and alter the taste of the butter. Stick to plain, unsweetened yogurt with live cultures.
-
Is it possible to make makhan from yogurt that is slightly sour?
Yes, slightly sour yogurt can still be used to make makhan. The butter will have a tangier flavor, which some people prefer. However, avoid using overly sour or spoiled yogurt.