Medu Vada Recipe – Home style
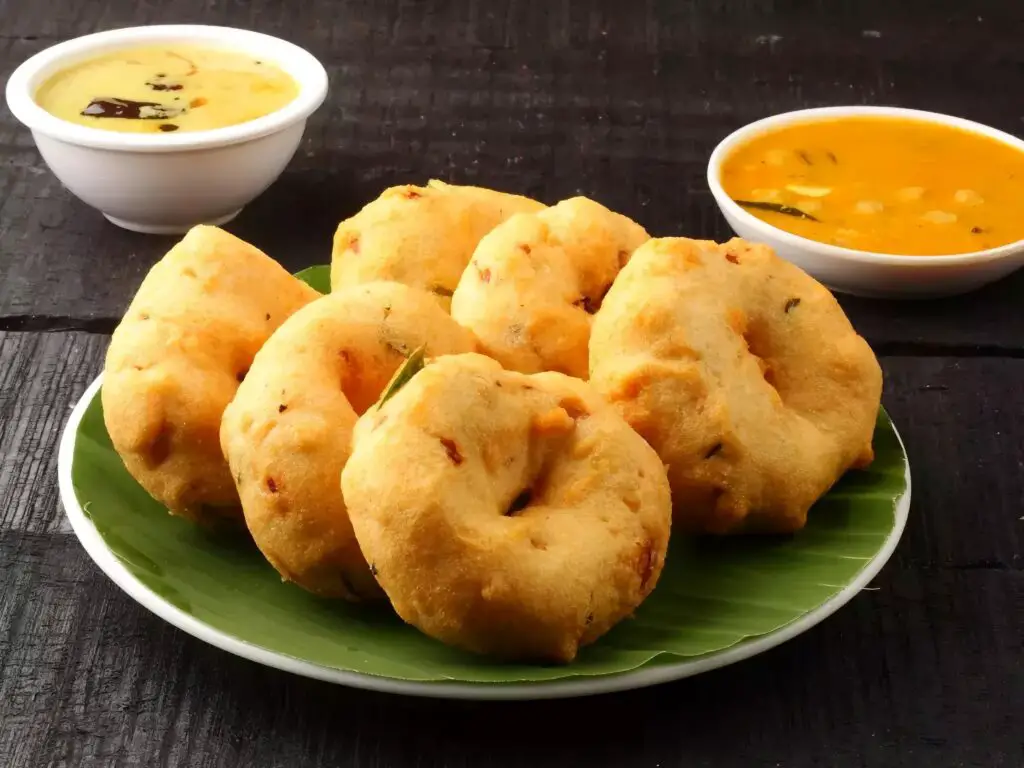
Medu Vada, also known as Urad Dal Vada, is a traditional South Indian snack that is popular across the country. This deep-fried delicacy is made from urad dal (black gram lentils) and is characterized by its crisp exterior and soft, fluffy interior. Typically served with coconut chutney and sambar, Medu Vada is a staple in South Indian households and is often enjoyed for breakfast or as a snack. Here is a detailed recipe to help you prepare Medu Vada at home.
Ingredients
For the Vada:
- Urad dal (split black gram): 1 cup
- Onion (finely chopped): 1 medium
- Green chilies (finely chopped): 2-3
- Ginger (grated): 1-inch piece
- Curry leaves (finely chopped): 8-10 leaves
- Black peppercorns: 1 teaspoon
- Asafoetida (hing): A pinch
- Salt: To taste
- Water: As needed (for soaking and grinding)
- Oil: For deep frying
For Serving:
Coconut chutney
Sambar
Preparation Steps
Step 1: Soak the Urad Dal
Rinse the urad dal: Begin by rinsing the urad dal thoroughly under running water. This helps in removing any dirt or impurities.
Soak the dal: Place the washed urad dal in a large bowl and add enough water to cover it. Let the dal soak for about 4-6 hours. Soaking is essential as it softens the dal, making it easier to grind into a smooth batter.
Step 2: Grind the Dal
Drain the water: After the dal has soaked sufficiently, drain the water completely. Be sure to remove all excess water to ensure the right consistency of the batter.
Grind the dal: Transfer the soaked and drained dal to a mixer or grinder. Add a very small amount of water, just enough to help the grinding process. Grind the dal into a smooth, thick, and fluffy batter. The batter should be of dropping consistency but not too runny.
Aerate the batter: Once the batter is smooth, transfer it to a large mixing bowl. Use a whisk or your hand to beat the batter vigorously for a few minutes. This step is crucial as it aerates the batter, resulting in lighter and fluffier vadas.
Step 3: Prepare the Vada Batter
Add spices and flavorings: To the aerated batter, add finely chopped onions, green chilies, grated ginger, curry leaves, and whole black peppercorns. These ingredients add flavor and texture to the vadas. Mix everything well.
Season with salt and asafoetida: Add salt to taste and a pinch of asafoetida (hing). Asafoetida adds a unique flavor and also aids in digestion.
Mix thoroughly: Combine all the ingredients well. The batter should be thick and fluffy. If the batter is too thick, you can add a few drops of water, but be cautious not to make it too runny.
Step 4: Shape the Vadas
Wet your hands: Keep a bowl of water nearby and wet your hands slightly. This prevents the batter from sticking to your hands while shaping the vadas.
Take a portion of batter: Take a small portion of the batter in your hand, about the size of a lemon.
Shape the vada: Using your thumb, make a small hole in the center of the batter to give it the traditional doughnut shape. The hole helps the vada cook evenly.
Form the vada: Carefully shape the batter into a round vada, ensuring the hole remains intact. Repeat the process with the remaining batter.
Step 5: Fry the Vadas
Heat the oil: In a deep frying pan or kadai, heat oil over medium-high heat. The oil should be hot but not smoking. To check if the oil is ready, drop a small amount of batter into the oil; it should sizzle and rise to the surface immediately.
Fry the vadas: Gently slide the shaped vadas into the hot oil, taking care not to overcrowd the pan. Fry the vadas in batches if necessary.
Cook until golden brown: Fry the vadas until they turn golden brown and crisp on the outside. This usually takes about 5-7 minutes per batch. Turn the vadas occasionally to ensure even cooking.
Drain the vadas: Once the vadas are cooked, use a slotted spoon to remove them from the oil. Drain the excess oil by placing the vadas on a plate lined with paper towels.
Step 6: Serve the Medu Vadas
Serve hot: Medu Vadas are best enjoyed hot and fresh. Serve them with coconut chutney and sambar on the side. You can also serve them with a side of tomato chutney or mint chutney for a different flavor.
Tips and Variations
- Consistency of the Batter: The consistency of the batter is key to making perfect Medu Vadas. The batter should be thick enough to hold its shape when dropped into the oil. If the batter is too thin, the vadas may absorb too much oil and become greasy. On the other hand, if the batter is too thick, the vadas might turn out hard and dense.
- Grinding the Batter: While grinding the urad dal, add water gradually. It’s better to add water in small quantities to control the batter’s consistency. The batter should be smooth and fluffy but not runny.
- Aeration: Beating the batter well after grinding is crucial. Aerating the batter helps in making the vadas light and airy. You can use your hands or a whisk to beat the batter. This step should not be skipped.
- Spices and Flavorings: The addition of onions, green chilies, ginger, curry leaves, and peppercorns enhances the flavor of the vadas. You can also add chopped coriander leaves for extra flavor. Some people like to add a pinch of baking soda or eno (fruit salt) to make the vadas even fluffier, but this is optional.
- Frying Temperature: Ensure the oil is at the right temperature before frying the vadas. If the oil is too hot, the vadas will brown quickly on the outside but remain uncooked inside. If the oil is not hot enough, the vadas will absorb too much oil and become soggy. The oil should be medium-hot, and the vadas should sizzle when dropped into the oil.
- Shaping the Vadas: Shaping the vadas with the traditional hole in the center can be tricky for beginners. If you find it difficult, you can simply drop spoonfuls of batter into the oil to make round fritters. While they may not have the traditional shape, they will still taste delicious.
- Serving Suggestions: Medu Vadas are traditionally served with coconut chutney and sambar. You can also serve them with other chutneys like tomato chutney, mint chutney, or tamarind chutney. For a more indulgent experience, you can serve the vadas with a drizzle of yogurt and a sprinkle of chaat masala.
- Storing and Reheating: Medu Vadas are best eaten fresh, but you can store them in an airtight container for a day. To reheat, place them in a preheated oven or an air fryer for a few minutes to restore their crispiness.
Conclusion
- Medu Vada is a quintessential South Indian snack that offers a delightful combination of crispy exterior and soft interior. Its versatility allows it to be paired with a variety of chutneys and sambar, making it a favorite across ages. While making Medu Vada at home might seem intimidating at first, with practice, you’ll be able to master the art of shaping and frying these delicious vadas.
- Whether you’re preparing them for a festive occasion or a simple family breakfast, Medu Vadas are sure to bring joy to your dining table. The key to perfect Medu Vadas lies in the right consistency of the batter, proper aeration, and careful frying. Follow this recipe step by step, and you’ll have golden, crispy, and fluffy vadas that are simply irresistible!
Here are ten frequently asked questions (FAQs) related to the Medu Vada recipe, along with their answers:
-
Why is my Medu Vada batter too runny?
The batter may be too runny if too much water was added during grinding. To fix this, you can try adding a small amount of rice flour or semolina (rava) to thicken the batter. Be cautious, as adding too much can make the vadas dense.
-
How can I make my Medu Vadas crispy?
To ensure crispy Medu Vadas, make sure the batter is thick and fluffy. Also, ensure the oil is hot enough when frying. Frying in medium-high heat ensures that the vadas cook evenly and become crispy.
-
Why do my Medu Vadas absorb too much oil?
Vadas may absorb excess oil if the batter is too thin or if the oil is not hot enough. Ensure the batter is of dropping consistency and that the oil is properly heated before frying.
-
Can I make Medu Vadas without onions?
Yes, you can skip the onions if you prefer or for religious reasons. You can enhance the flavor by adding extra spices like cumin seeds, black peppercorns, or finely chopped coriander leaves.
-
How can I make Medu Vada without a hole in the center?
If shaping the vada with a hole is difficult, you can simply drop spoonfuls of batter into the oil. They may not have the traditional shape, but they will still taste great.
-
Is it necessary to soak the urad dal for 4-6 hours?
Yes, soaking the urad dal for 4-6 hours is important as it softens the dal, making it easier to grind into a smooth batter. Insufficient soaking may result in a coarse batter and dense vadas.
-
Can I store leftover batter, and how long will it last?
Yes, you can store leftover batter in an airtight container in the refrigerator for up to 24 hours. Before using, bring the batter to room temperature and beat it well to restore some of the lost aeration.
-
Can I use a mixer grinder to grind the batter?
Yes, a mixer grinder works well for grinding the urad dal. Add water gradually to avoid making the batter too runny. Ensure you grind the dal into a smooth, fluffy paste.
-
What can I serve with Medu Vadas?
Medu Vadas are traditionally served with coconut chutney and sambar. You can also serve them with tomato chutney, mint chutney, or even plain yogurt with a sprinkle of chaat masala.
-
Can I air-fry Medu Vadas instead of deep-frying?
Yes, you can air-fry Medu Vadas for a healthier version. Preheat the air fryer to 180°C (356°F) and air-fry the shaped vadas for about 10-15 minutes, flipping halfway through, until they are golden and crisp. The texture may differ slightly from deep-fried vadas.