Delicious Cheese cake recipe
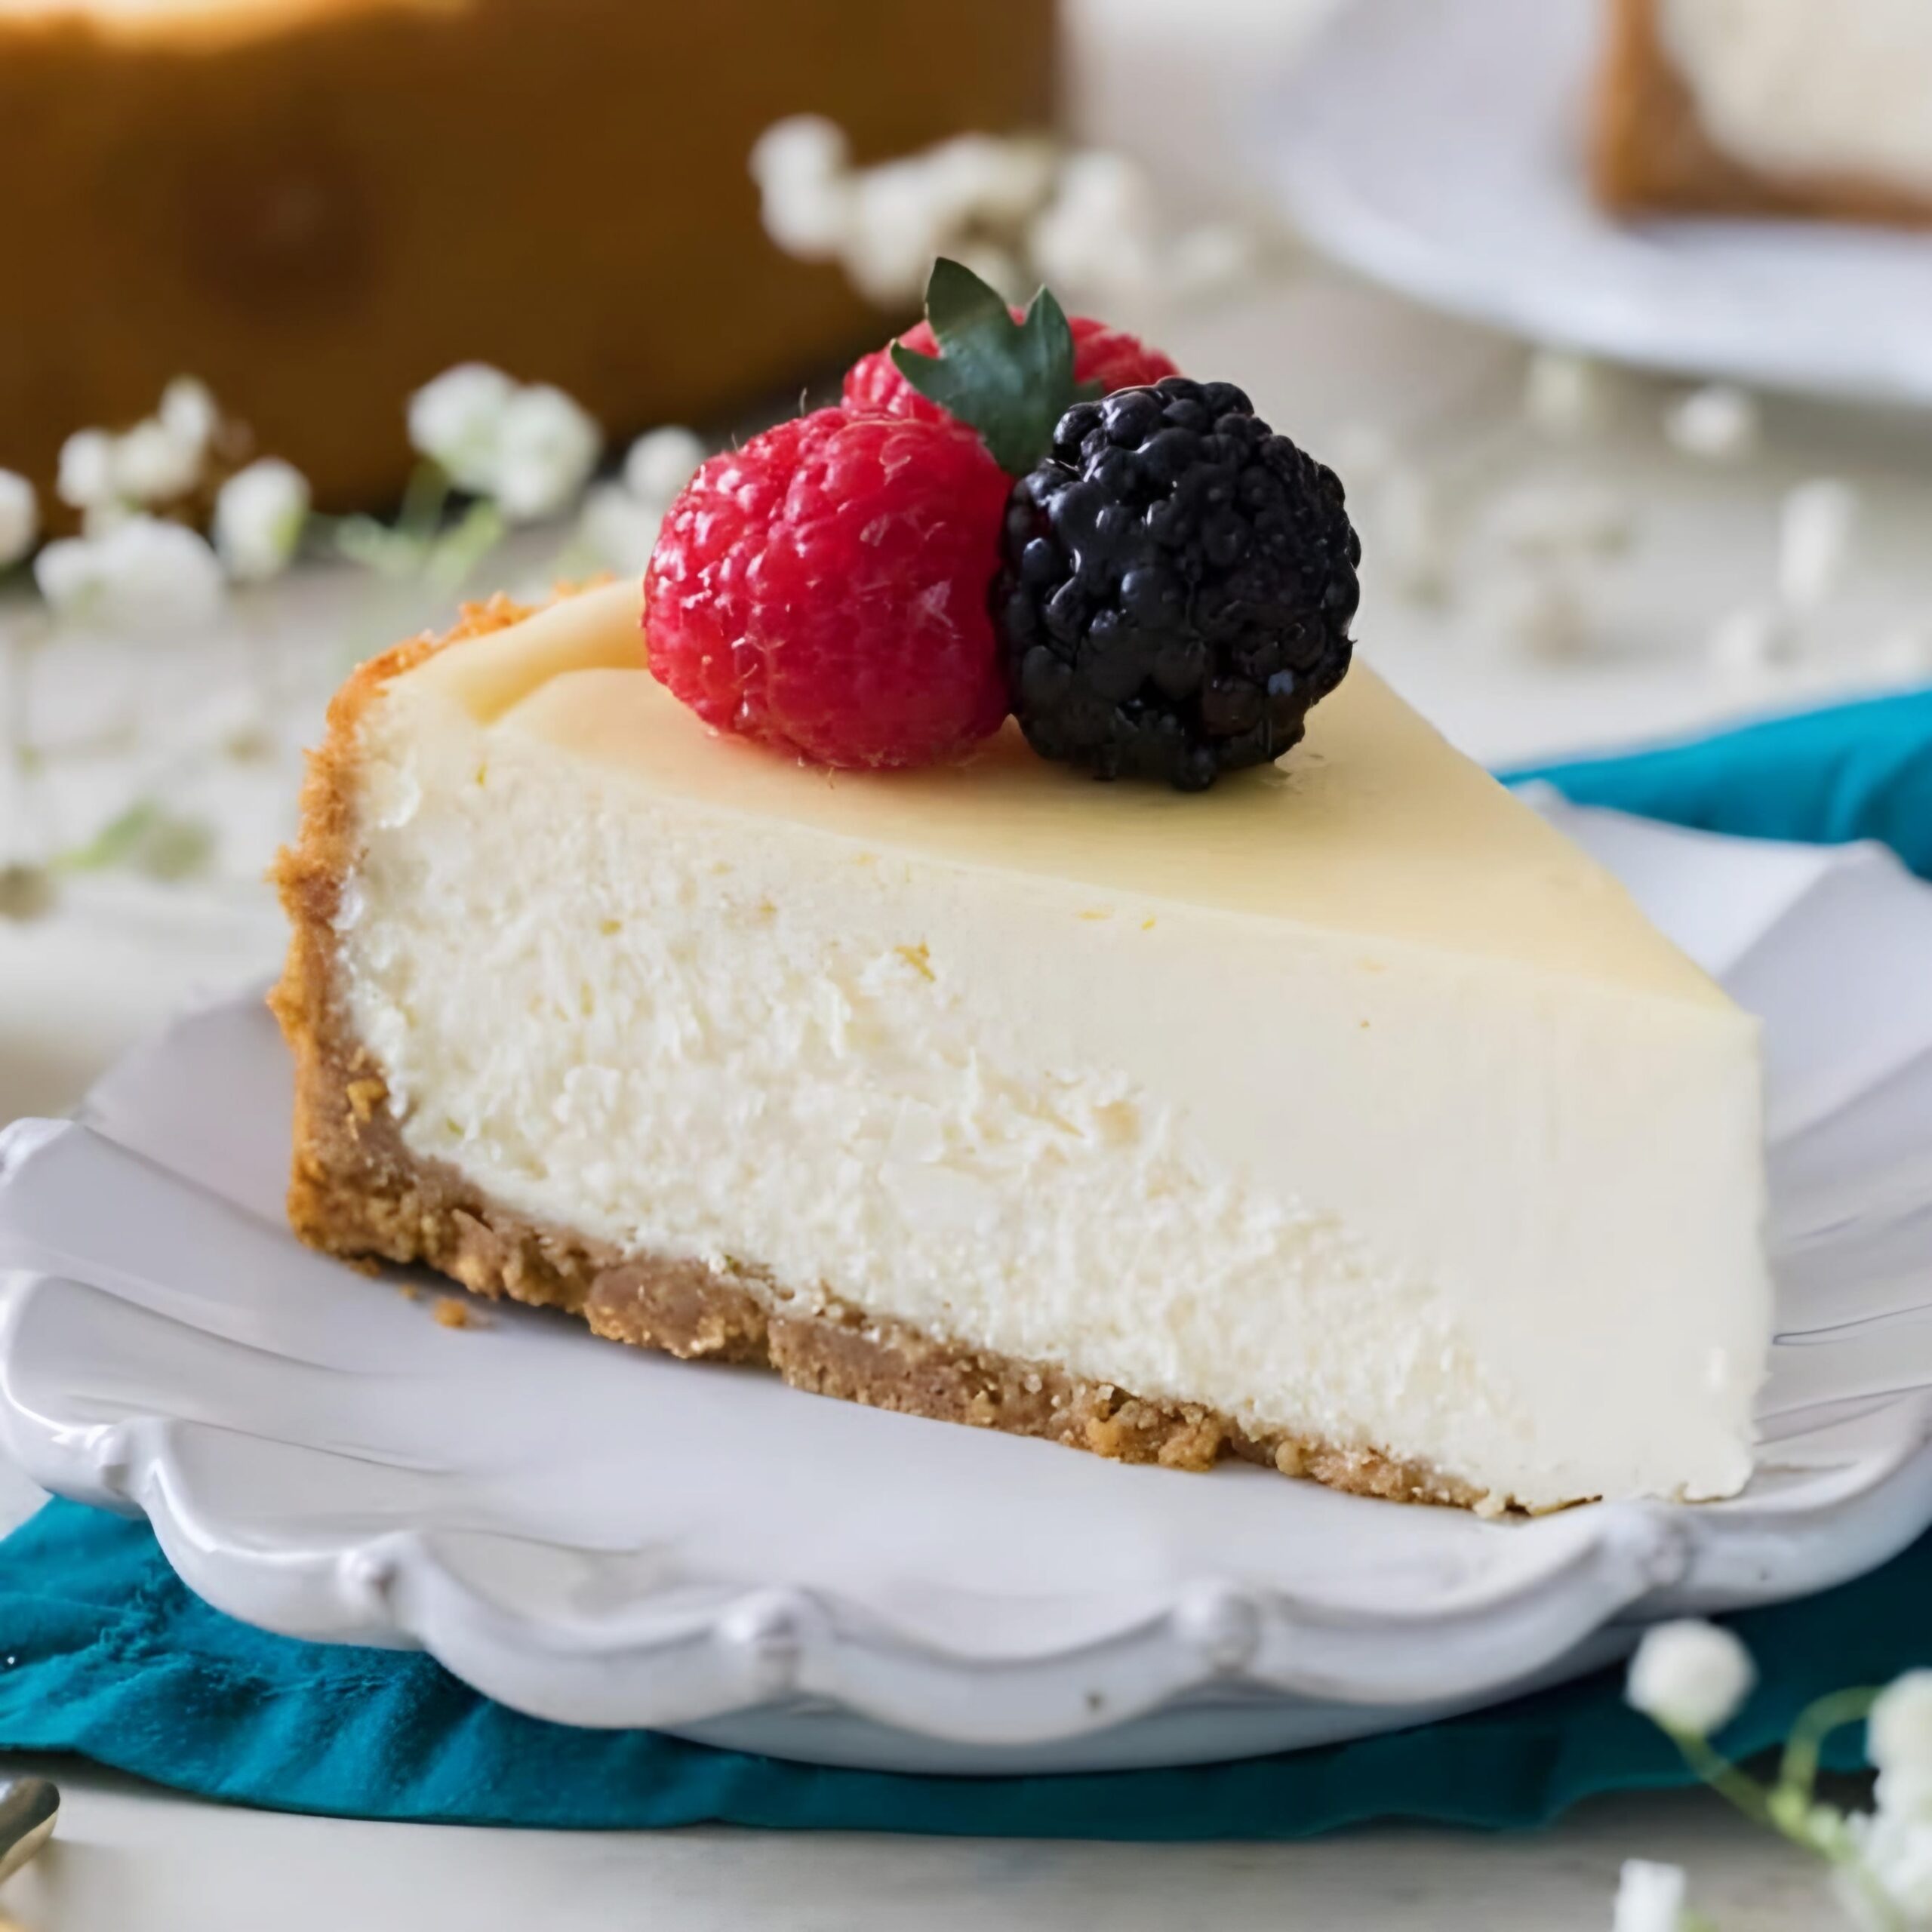
Are you craving a delicious and creamy dessert? Look no further than this classic cheesecake recipe. Today, we’ll guide you through the process of making a mouthwatering cheesecake from scratch. With simple ingredients and easy-to-follow steps, even novice bakers can create this heavenly treat.
The history of cheesecake dates back to ancient Greece, where it was served to athletes during the first Olympic Games in 776 B.C. The Romans later spread the recipe throughout Europe. In the 18th century, Europeans began removing yeast and adding beaten eggs to the cheesecake, resulting in a lighter, richer dessert. When Europeans immigrated to America, they brought their cheesecake recipes with them. In the late 19th century, New York-style cheesecake emerged, featuring a cream cheese base and a signature dense, smooth, and creamy consistency. Today, cheesecake remains a beloved dessert with countless variations enjoyed worldwide.
Cheese cake Ingredients:
For the crust:
- 1 1/2 cups graham cracker crumbs
- 1/3 cup unsalted butter, melted
- 1/4 cup granulated sugar
For the filling:
- 4 (8 oz.) packages of cream cheese, softened
- 1 1/4 cups granulated sugar
- 4 large eggs
- 1/3 cup heavy cream
- 1 tablespoon vanilla extract
- 1/4 teaspoon salt
Cheese Cake Preparation Process:
Step 1: Preheat the oven
Set your oven to 350°F (175°C). This ensures that the oven is at the right temperature when you’re ready to bake.
Step 2: Prepare the crust
In a medium bowl, mix the graham cracker crumbs, melted butter, and 1/4 cup of sugar. Stir until well combined. Press the mixture into the bottom of a 9-inch springform pan. Use a flat-bottomed glass or measuring cup to compress the crust evenly. Bake for 10 minutes, then remove from the oven and let it cool.
Step 3: Make the filling
In a large bowl, beat the softened cream cheese and 1 1/4 cups of sugar with an electric mixer. Mix until smooth and creamy. Add the eggs one at a time, beating well after each addition. Pour in the heavy cream, vanilla extract, and salt. Mix until all ingredients are well incorporated.
Step 4: Pour the filling
Pour the cheesecake filling over the cooled crust. Use a spatula to smooth the top.
Step 5: Bake the cheesecake
Place the cheesecake in the preheated oven. Bake for 1 hour, or until the center is almost set. The cheesecake should jiggle slightly when the pan is tapped.
Step 6: Cool and chill
Remove the cheesecake from the oven. Let it cool at room temperature for 1 hour. Then, refrigerate the cheesecake for at least 4 hours or overnight. This allows the cheesecake to set properly.
Step 7: Serve and enjoy
Once chilled, remove the cheesecake from the springform pan. Slice and serve plain or with your favorite toppings, such as fresh berries, chocolate sauce, or whipped cream.
Tips for success:
- Make sure all ingredients are at room temperature before starting. This helps create a smooth and creamy filling.
- Avoid overbaking the cheesecake. It should still jiggle slightly in the center when done.
- If the top of the cheesecake starts to brown too quickly, tent it with aluminum foil.
- To prevent cracks, place a pan of water on the lower rack of the oven while baking. This creates a moist environment.
- Allow ample time for cooling and chilling. Rushing this process can result in a subpar texture.
Variations:
- For a fruity twist, add a layer of your favorite fruit compote on top of the chilled cheesecake.
- Create a chocolate cheesecake by adding 1/2 cup of melted semisweet chocolate to the filling.
- Experiment with different crusts, such as vanilla wafer cookies or gingersnaps.
In conclusion, making a delectable cheesecake is easier than you might think. With this simple recipe and step-by-step instructions, you can create a showstopping dessert that’s sure to impress. Whether you’re celebrating a special occasion or simply satisfying your sweet tooth, this classic cheesecake recipe is a winner. So, gather your ingredients, preheat your oven, and get ready to indulge in a slice of pure bliss.
Here is the FAQs of Cheese cake recipe:
Q: Can I use low-fat cream cheese for this recipe?
A: While you can use low-fat cream cheese, it may affect the texture and richness of the cheesecake. For best results, use full-fat cream cheese.
Q: Can I make this cheesecake without a spring form pan?
A: A spring form pan is recommended for easy removal of the cheesecake. However, you can use a regular cake pan lined with parchment paper.
Q: How do I know when the cheesecake is done baking?
A: The cheesecake should jiggle slightly in the center when the pan is tapped. It will continue to set as it cools.
Q: Can I freeze this cheesecake?
A: Yes, you can freeze the cheesecake for up to 2 months. Wrap it tightly in plastic wrap and aluminum foil before freezing.
Q: How long does the cheesecake last in the refrigerator?
A: The cheesecake can be stored in the refrigerator for up to 5 days.
Q: Can I use a different type of crust?
A: Yes, you can experiment with different types of crusts, such as vanilla wafer cookies or gingersnaps.
Q: Can I add other flavors to the cheesecake filling?
A: Yes, you can add various flavors to the filling, such as lemon zest, orange zest, or different extracts like almond or mint.
Q: How do I prevent cracks in my cheesecake?
A: To prevent cracks, place a pan of water on the lower rack of the oven while baking. This creates a moist environment. Also, avoid over baking and allow ample time for cooling and chilling.
Q: Can I make this cheesecake ahead of time?
A: Yes, you can make the cheesecake a day or two in advance. Store it in the refrigerator until ready to serve.
Q: Can I use a food processor to make the crust?
A: Yes, you can use a food processor to pulse the graham crackers into fine crumbs for the crust.
Q: How many servings does this cheesecake recipe yield?
A: This cheesecake recipe typically yields 12 servings, depending on the size of the slices.
